Two little ornaments.
Cast in plaster, hand painted and made to look very ancient and old.
The Father Christmas with the tree clutched in his blue mittened hands, wearing his red hat and coat. His nose is nipped with the cold.
The little Toy Soldier in his black hat and boots, gold shoulder patches and red jacket.
Headed off in a specially handmade box, nestled into red colored straw.
Going to their new home, to decorate and celebrate the holiday season and year ending.
To nestle in the branches, or peer out from the depths of a wreath.
Or maybe to perch on top of a package wrapped in gold and silver paper.
Wednesday, December 31, 2008
Tuesday, December 30, 2008
Measuring and Taking Stock
Wondering, Counting and Pondering
Those two things aren't always the same thing, I think.
I enjoy the blog and writing about what's on my mind at the time. It's sometimes a little random. The series about 'Legendary Jewelrymakers' when I find someone's work that inspires. A tutorial or two - I hope to do more series of tutorials next year. Mentioning folks that I find inspiring, whether on Etsy or other places, to share how creativity is a gift that's meant to be given away and cherished.
Do you notice that I try to match up my post topic with Etsy favorites that mirror the theme? I've found some wonderful talent on Etsy that way, I hope you have, too.
I've been thinking a lot lately. Here I go, sharing some of those random thoughts with you.
I make year-end resolutions, after thinking about the time that's past, and the fresh new year ahead.
I'm thinking about how to measure things.
For recipes, there are wet measuring cups and dry ones, and you should use the correct measure to get the results you want.
Is there a similar situation in life? Does how we measure things make a difference, a change in the outcome?
Is there a recipe book for success?
For fulfillment?
Those two things aren't always the same thing, I think.
I enjoy the blog and writing about what's on my mind at the time. It's sometimes a little random. The series about 'Legendary Jewelrymakers' when I find someone's work that inspires. A tutorial or two - I hope to do more series of tutorials next year. Mentioning folks that I find inspiring, whether on Etsy or other places, to share how creativity is a gift that's meant to be given away and cherished.
Do you notice that I try to match up my post topic with Etsy favorites that mirror the theme? I've found some wonderful talent on Etsy that way, I hope you have, too.
If I measure my year's success by the amount I've learned, it's been a wonderful year.
I've stretched my creativity and learned many new things. Last year at this time I didn't have a torch and had never fused fine silver, just one example. Something new and fun that I enjoy has been added to my toolbox. And etching copper, that's something I had not done until this summer, and always wanted to learn.
Do you set goals for yourself every year? I believe that goals help you find your direction, not be aimless.
And if you have them, you know when you've arrived, when you cross one of them off the list.
Something to celebrate.
Progress.
From a publishing side, I realized a long-time dream in having three articles published with my designs and ideas (with one more pending publication in spring 2009).
I didn't know if I could accomplish that, but I sent in proposed submissions and they were accepted!
If I measure by the number of new friends and connections to people through this blog and through the Etsy shops, it's been a fantastic year. So many of you I would not have known, or followed your progress as you have encouraged mine.
The replies and comments you post, the conversations you start on the blog posts, mean so much to me! It lets me know you are interested and what you are thinking, too.
The charm swap is one example of that, working together with other creative people, some I knew and some I met for the first time.
Rewarding in all ways you can imagine.
Monday, December 29, 2008
Dove Grey and Copper Sparks
In the evenings I've been working, kind of slowly, to finish this necklace. It's been over a week.
I've had the patinaed charm in a little bag, and pulled it out to match up with the hand dyed dove grey costume pearls.
They almost have a lilac or violet tone to them. When I dye the pearls I don't always know what exact color I will get. It's a surprise, a nice one.
And the pearls vary a bit in tone, so they look more vintage to me. As though they've been slightly faded, worn by time. The round textured chain links came from an old necklace I took apart, I used two of the links in this necklace. And the little dangle is a black glass leaf, with silvertoned lines on it for the details.
I found this darkened oversized chain, in two sizes, that I used to finish the necklace and use as one of the strands of the three-strand necklace. Then I opened my goodie bag of faceted fumed glass beads, to make the dangles.
The hook is attached to a long, thin glass bead and some more violet gray hand dyed costume pearls. I wanted this little necklace to look like something post-war with military medallions and watch fob chains on it.
Like something found among some saved 1940's coins and stitched patches from someone's sleeves, maybe in a wooden cigar box at the back of the bureau.
I wish I could create more quickly, but I finished this up finally, making the three-to-one connector and the clasp out of darkened steel wire and put it around my neck. Lovely.
I get a good feeling when I finish one, especially if it's taken a while.
Sunday, December 28, 2008
Road Trip With an Angel Baby
Saturday, December 27, 2008
Draping the Form - Part 3
Finishing Touches, Head and Shoulders
Years ago, in a far away place in North Texas, I used to do some theater work, creating costumes and props for plays. Among other jobs during college, I worked at a craft center in a small town in Texas. I put those two things together in kind of an odd way, to create this little shaped and draped neckline form.
This bottle is Aleene's Fabric Stiffener. Some folks who make crocheted stars for ornaments use it to stiffen them permanently, so they'll hold their little six-pointed shapes when they're hung.
It's also good for putting cloth into, to create angels and Santa figures, so the cloth will drape when they stand up.
I'm using it here to give my lightweight bust form a stiff shape, so it will stand up on its own. I think it's just very thick white glue. You could probably use glue if you have that instead. I diluted this as the instructions suggested, but if you use white glue you might not want a 1:1 dilution.
I didn't pre-wash the unbleached muslin cloth before I used it. You could use an old sheet if you have that handy.
I tore the square off instead of cutting it, that way I got a nice straight of grain cut across the cloth. A pillowcase might be large enough, but I wanted to have a large open square of fabric so I could make nice drapes on the form.
However large you want the finished form, bring the cloth down on the plastic shape. The stiffener will make the cloth able to stand on its own. But don't close up the bottom, or wrap the cloth across the bottom, if you want to remove the shaping form later as I did. Otherwise you'll have to cut the form open to get the shaping form out.
Mix the diluted stiffener and water together into a plastic container, and dip the cloth right into it, to get it saturated with the stiffening agent.
Then re-drape over the form sitting on top of plastic to catch the drips.
Use your hands to smooth and shape the draped cloth the way you want it.
I added more stiffener onto the cloth after I draped it, to be sure it was good and saturated. It will drip for a while, so be sure you have something underneath to catch the extras drippings, as it will harden and be difficult to clean up if you don't put the plastic or newspaper (or both!) underneath.
Leave it on its own for 12-24 hours to dry completely before you take it off the form.
Resist the temptation to move it, mess with it or change it. Just let it sit and completely dry in place. If it's dripping, wipe up the excess stiffener but don't play around with the fabric now.
It will start to dry from the top down, as the excess liquid moves down the form. Let it dry completely until the lowest level of draping feels totally dry to the touch.
If you put enough stiffener in it, it'll easily slide off the plastic shaping form, but hold the shape all on its own. Be a little careful, it's possible to crush it if you press too hard, it's not like concrete or anything.
You can re-use the form now to make another one, maybe in a different color cloth, if you want. I think one in a deep black cloth would be cool! If you're done, you can unwrap everything and put into the recycling bin and just enjoy your new draping form!
You could do something similar with papier mache instead of fabric. Tearing newspaper into strips, dipping in the glue and wrapping around the plastic-wrapped form. You might have to cut it off the shape afterward, but that might be another neat look for a draping form. I may try that method later, just to see how it turns out. I need to make an earring form, too!
I hope this little tutorial on how I made my draping form is useful to you, if you make one I'd love to hear about it, or see photos, if you'll share them!
This bottle is Aleene's Fabric Stiffener. Some folks who make crocheted stars for ornaments use it to stiffen them permanently, so they'll hold their little six-pointed shapes when they're hung.
It's also good for putting cloth into, to create angels and Santa figures, so the cloth will drape when they stand up.
I'm using it here to give my lightweight bust form a stiff shape, so it will stand up on its own. I think it's just very thick white glue. You could probably use glue if you have that instead. I diluted this as the instructions suggested, but if you use white glue you might not want a 1:1 dilution.
I didn't pre-wash the unbleached muslin cloth before I used it. You could use an old sheet if you have that handy.
I tore the square off instead of cutting it, that way I got a nice straight of grain cut across the cloth. A pillowcase might be large enough, but I wanted to have a large open square of fabric so I could make nice drapes on the form.
If you've ever made a holiday angel for the top of the tree, it's most likely a very similar process.
It's a good idea to check one more time at this point in the process, that the film-wrapped plastic form is very steady and stable on its base.
Then wrap the fabric around the form. I started at the neck, then wrapped the corners around each side and tucked everything in nice and tight.It's a good idea to check one more time at this point in the process, that the film-wrapped plastic form is very steady and stable on its base.
However large you want the finished form, bring the cloth down on the plastic shape. The stiffener will make the cloth able to stand on its own. But don't close up the bottom, or wrap the cloth across the bottom, if you want to remove the shaping form later as I did. Otherwise you'll have to cut the form open to get the shaping form out.
Mix the diluted stiffener and water together into a plastic container, and dip the cloth right into it, to get it saturated with the stiffening agent.
Then re-drape over the form sitting on top of plastic to catch the drips.
Use your hands to smooth and shape the draped cloth the way you want it.
I added more stiffener onto the cloth after I draped it, to be sure it was good and saturated. It will drip for a while, so be sure you have something underneath to catch the extras drippings, as it will harden and be difficult to clean up if you don't put the plastic or newspaper (or both!) underneath.
Leave it on its own for 12-24 hours to dry completely before you take it off the form.
Resist the temptation to move it, mess with it or change it. Just let it sit and completely dry in place. If it's dripping, wipe up the excess stiffener but don't play around with the fabric now.
It will start to dry from the top down, as the excess liquid moves down the form. Let it dry completely until the lowest level of draping feels totally dry to the touch.
If you put enough stiffener in it, it'll easily slide off the plastic shaping form, but hold the shape all on its own. Be a little careful, it's possible to crush it if you press too hard, it's not like concrete or anything.
You can re-use the form now to make another one, maybe in a different color cloth, if you want. I think one in a deep black cloth would be cool! If you're done, you can unwrap everything and put into the recycling bin and just enjoy your new draping form!
You could do something similar with papier mache instead of fabric. Tearing newspaper into strips, dipping in the glue and wrapping around the plastic-wrapped form. You might have to cut it off the shape afterward, but that might be another neat look for a draping form. I may try that method later, just to see how it turns out. I need to make an earring form, too!
I hope this little tutorial on how I made my draping form is useful to you, if you make one I'd love to hear about it, or see photos, if you'll share them!
Friday, December 26, 2008
Draping the Form - Part 2
Forming the Shape
If you're following along on making the draping form, here's where I got started.
I saved two empty rolls from packing tape dispensers. Those are the large round cardboard rolls.
And two empty milk jugs. They're what made me think of this project. I thought the handles looked like shoulders. These were saved from being crushed and added to the recycling bin.
The tape is blue painting tape, the wide kind. And a roll of plastic garbage bag liners, to put down on the table and also for covering the form later.
The red plastic container is optional, it's an empty container that used to hold flavored coffee grounds - Hazelnut, I think. The black plastic lid is still on it. If you want a bulky form you'll need it. If you prefer a straighter shape on your form, you won't need it. Slim vs bustier.
You'll need a square of muslin weight cloth, 36 inches or about a yard square. I used unbleached muslin, but any cloth that weight will work.
You don't have to go to a lot of trouble getting these exact things if you don't have them. This is just what I used -- if you have something else that's similar I'm sure it will work just as well.
Be creative -- if you find another way to do this, be sure to let me know. This was an experiment!
Tape the two wide cardboard rolls together end to end, and the two plastic milk cartons together with the handles opposite each other. Then tape the cardboard rolls to the top of the plastic milk cartons in the center.
Be generous with the tape. I used the blue painters tape so I could easily take everything back apart, but you could use duct tape if you don't mind the permanence of it.
Then enclose the entire thing in an upside down clear plastic garbage can liner. Tighten it up nicely, tucking and twisting to make everything nice and snug. If you want a thicker body shape, add the rounded coffee container to the front before putting on the plastic liner.
I had a large roll of wide plastic wrapping film, the kind that's used for moving. It's wrapped around things to keep them from sliding or drawers from opening. If you don't have that, I'm sure that regular plastic food wrap would work just as well.
On top of the clear plastic liner, start wrapping the components in the plastic film. Wrap the form up tightly like a mummy.
The film will stick to itself, just keep wrapping until everything is slick and covered and all nicely shaped. Be sure you cover the bottom also.
One last suggestion before we move on to the messy part in the next post - be sure the mummy-wrapped form sits down nicely on its bottom and doesn't want to fall over. If it's a little shaky, now is the time to fix it!
You'll be glad later if you take the time to flatten and solidify the bottom now! Believe me about that part ...
Thursday, December 25, 2008
Draping the Form - Part 1
Neck and Shoulders Above All
Many people I admire display and photograph their jewelry using forms, body-shaped sculptural sewing or draping forms.
I always thought it looked really great.
I used to have two bamboo torso shapes, but in the several relocations and moves both of them are now with someone else. One was just a torso, and sat on a metal base. The other one was a full length bamboo mannekin from neck to feet, free standing on her own.
I thought I'd be able to easily replace them, but haven't had success in finding something similar to them again.
I didn't have access to a mannekin or bust, cast off from a store or clothing design loft, something like that. And some of the antique sewing forms, although lovely, are out of my price range. If you find one sometime, give in to that impulse and take it home with you.
This made me start thinking about how I could possibly make something myself. Using wire sounded time-consuming, and possibly difficult to solder. And I wanted something that looked soft and padded. The wire dress forms sounded like something hard and firm, not soft and padded.
I mentioned a while back that I had some ideas about how to make one. I gathered up the things I thought I needed, and last weekend I gave my idea a shot.
Trying it out in the basement, I came up with a greek-looking neckline form, draped in cloth with a long thin neck. It looks like it's wearing a toga, wrapped and draped in folds.
I like it, and I think it will be great to dress it with lace and other trim to accentuate the jewelry photos. I want to try it with some lacy shirts or turtlenecks, to see if it can wear clothes and accessories.
Wouldn't that be fun?
While in this process, I photographed the steps I used to make the form you see pictured here. I had been saving up some items that normally would go into the recycle bin, to use to build this lightweight bust.
So, as a little gift to those of you who might be interested in having a bust like this for yourself, I'll be posting a tutorial and photos the next few days.
I hope you are having a lovely day, with feasting, family and friends - Happy Happy Merry Merry!!
Wednesday, December 24, 2008
Angels Heard On High
ANGELS WE HAVE HEARD ON HIGH,
SWEETLY SINGING ON THE PLAIN,
AND THE MOUNTAINS IN REPLY
ECHOING THEIR JOYOUS STRAINS ...
SWEETLY SINGING ON THE PLAIN,
AND THE MOUNTAINS IN REPLY
ECHOING THEIR JOYOUS STRAINS ...
GLORIA, IN EXCELSIS DEO
Angels we have heard on high
Sweetly singing o'er the plains
And the mountains in reply
Echoing their joyous strains
Gloria in excelsis Deo
Come to Bethlehem and see
Christ whose birth the angels sing
Come adore on bended knee
Christ the Lord the newborn King
Gloria in excelsis Deo
See him in a manger laid
Whom the choirs of angels praise
Mary, Joseph, lend your aid
While our hearts in love we raise
Gloria in excelsis Deo
Gloria in Excelsis Deo
Tuesday, December 23, 2008
Monday, December 22, 2008
Toys, Wings and Medals Newly Ancient
CHARMING MEDALLIONS
My hands are covered with paint, and all up under my fingernails too -- in a bit I will go and clean them, scrubbing until the paint comes off. And thaw myself out, with a hot mug of cocoa. It's been bitterly cold here.
I've been trying out some gold-toned charms in resin, making them and putting an antique red-gold patina on them. That's why my fingers are painted, and my fingernails.
It's been so cold I wasn't sure the resin would set correctly. It did seem to take longer than I've seen it take before. I left it overnight, just to be certain.
If there's anything I have learned about working with resin, it's to leave it alone.
Don't move it, touch it or even rearrange it. Just leave it to harden. But I did put it near a spotlight lamp so it would get a little warmth on it that way.
Two of them are casts I made from religious medallions I brought back from the trip to Ireland. I don't want to part with the original metal ones, they are some of my mementos of the trip. So I cast them to make molds, and made these resin replicas.
And a little fleur-de-lys charm. With the Celtic cross design, these look like a set, to use in a design together.
These resin charms are an experiment. I used resin with gold coloring added. When they came out of the molds they were very bland looking. Flat gold color, no details showing.
So I used some fun colors and put a patina on them. Now they look very old. I wanted them to look ancient, with a dark color in the deep groves and indented places, and a shiny worn look on the high spots.
I plan to use these in jewelry designs, maybe a necklace or charm bracelet. They're easy to drill to make holes wherever they need one.
Three of them are wings, bird or angel wings. They have a beat-up and well-loved look to them.
Two are sea shell shapes. The molds were made by casting some real shells I collected from the beach years ago.
The patinaed resin shells don't look like real shells now, they look more like fossils. Or carved nuts in the shape of shells.
One is a tiny toy racecar. It's so quaint, like a toy prize from a Cracker Jack box. Or a child's saved toy, put aside years ago. Just a hint of red paint clings to its sides, and a shiny gold tone on the hood and fenders.
~~~~~~~~~~~~~~~~~
For some decorating ideas on how to use art beads, charms and buttons, my post on Art Bead Scene on using wire to make an ornament is posted today, hop over and check it out.
Sunday, December 21, 2008
Overhead and Underfoot
Converting Floor Mosaics to Quilts in Style
In Europe, there are floors in cathedrals that are mosaics. Also in Barcelona, in the Ensanche area, there are patterns dating from 1859, in private homes and public buildings both. The geometric shapes feature diamonds, triangles squares and rectangles.
In Islamic art there are no representations of the figure, so many decorative areas in homes and religious buildings have geometric repetitive designs.
Many of these styles of ceramic tiling have been converted to patterns for use in quilts.In Islamic art there are no representations of the figure, so many decorative areas in homes and religious buildings have geometric repetitive designs.
Hand dyed fabrics that resemble stones are sometimes used in these quilts, to make them look even more like mosaic tiles.
Many European travelers take photos of these floors to be able to convert them using graph paper, to create a new pattern for use to replicate these traditional stone tile designs in fabric.
I like to make my hand dyed fabrics look like marbled stones, but haven't made a quilt using them in this style. I think it would be neat to do, though.
Islamic patterns, tiles and brickwork and roman mosaics have inspired many beautiful quilt patterns.
Christine Porter is a quilt maker who has interpreted victorian tiles found in England into quilt designs. Her book 'Viva Venezia' shows quilt patterns inspired by floor tile designs from Venice, made using marbled batik fabrics to resemble the marble tiles in the original floor pattern.
This is a pattern from St. Andrew's Cathedral in Inverness, Scotland, pinwheels with an intricate cream pattern, corner tiles on the edge in blue and terracotta.
Byzantine churches also had mosaic floors that would be useful designs for fiber art projects, like this one from the Capella Palatina in Palermo, Sicily.
I'm working on some ornaments that are based on quilt patterns. When I get some finished I'll post some photos here.
Saturday, December 20, 2008
Studio Tour - Work in Progress
A while back I posted about the relocation of my upstairs studio, swapping out with my hubby's office space in the basement.
For the last few weeks I've been working and making jewelry and ornaments around the unpacking and rearranging.
I turned on all the work lighting and the overhead lighting to take these pictures. And yes, that's a space heater next to the beading desk - the patio door is right across the way and there's a definite breeze! Gusts and puffs! BRRRR....
Most of my workbenches are on casters and rollers, so I move them around as I need them. The industrial carpet on the basement floor makes it easy to push them here and there. When I'm working in polymer clay, I roll over the desk with my equipment on it, and when I'm done I roll it back against the wall.
I said I'd post some photos of the new space. And I kept trying to find a time when things were tidy and clean to get some good pictures. I'd clean up, get everything all arranged.
And then I'd need to work on something really quickly and get everything back out again.
I fnally decided there was no perfect time to show you some photos of the new set up, so I went ahead and made some quick snaps on the weekend. So please pardon the mess, I was right in the middle of making some ornaments.
I enjoy the candles, and have a group in front of the fireplace when I'm working and it's dark outside.
During the week it's always dark when I'm in the basement studio space, either very early in the morning or late at night. These photos were taken on a weekend during the day, and you can see I have a lot of focused lighting around the room.
You can see the computer desk with the scanner is right next to the little photography bench.
I keep a ladderback chair next to the tripod for the camera, sometimes I'm taking photos for a long time and need to sit down to focus.
It's hard to focus the camera when your hands are shaking!
The jewelry and bead desk has a huge top on it, but I still manage to cover it with boxes and organizers of beads and findings. I keep things on trays, so I can easily lift them and carry them into another room if I need to take them on the move.
The desk doors in front open and I have both sets of drawers in the sides, so I can put things away when I'm not using them.
The work lighting is color daylight corrected standup lamp, I can pull it around to where it's needed.
I don't have a closet in the basement area so I use industrial type metal shelving to hold the supplies. The clear shoeboxes are full of supplies, sandpaper and things that I need. Tools and materials right there in plain view, since for me out of sight is totally out of mind and forgotten. I'm very visual, I need to see what's there for projects.
And when I'm not using the buffer, oven, tumbler and other equipment, I store it on the shelving units next to the window.
There are two rolling typing tables that I use when I'm doing buffing on beads. They have swingarm lamps attached right to the typing table, so the light source goes right along with the work surface.
That keeps the space very flexible for me as I change from working with metal, fiber or glass. I can get out the supplies and equipment I need right then, and then put them away when I'm finished.
It's a generous sized space, I spend a lot of time in the studio on the weekends and at night. I have music and a television there I can watch if there's something special I don't want to miss. And the radio on the weekends, I listen to a lot of NPR shows.
There's a whole wall of shelving. And I've managed to fill it with books, jars of buttons and a scale for weighing things.
And there's room to grow, which is good because I love to buy books and add to my little library.
This is the dry and semi-clean section of the basement studio. The other side is where the glass is cut and fused, where the metal is etched. The soldering station and all the messy parts of the creative process are in the other side of the basement, keeping it all away from the sewing machine, computer, camera and other sensitive equipment.
Sorry for the mess, hope you enjoyed seeing the workspace. I believe that making things and being creative is messy!
Friday, December 19, 2008
A Tale of Two Women
I really enjoy making things, and sending them to people who will use them to tell their own stories with them.
Sometimes I don't get a chance to see or hear the special story that they inspire.
On rare occasions someone shares the results with me. It's really wonderful when that happens! I love to see the little beads or charms enhanced and transformed by the person who makes them their own.
One of those times happened recently.
To celebrate the one year anniversary of my blog, I created a little glass charm with the word 'ONE' over the portrait of a solemn lady, with another woman in a circular mat on the other side.
I offered it as a gift, to someone who posted a reply on the blog, to say 'thank you' for all the support and encouragement.
There were lots of replies to the post. I put all the names in a hat and pulled one out to see who would receive the little charm.
The winner of the charm was Beth Himmela of HINT, a very talented lady who works in silver.
She shared with me the design she made with the charm, a beautiful necklace. But even more special is that she shared the story of what the little images spoke to her.
I'm so thrilled when something I made with lots of pleasure, can go and belong to someone else and give them a new story to tell.
Be sure to go to her blog and read it, it will warm your heart.
Thursday, December 18, 2008
Tread the Stones of History
A Walking Tour into The Past
In France, in the cathedrale de Notre-Dame, Chartres, there's a labyrinth in the floor in black and white stone, in the middle of the nave centered between the fourth and fifth bays from the west end.
It's a circular labyrinth, oriented toward the westerly direction, with an overall diameter of 41 feet, and a 5 foot 6 inch circular pattern in the center of the design. It's one of the last surviving original labyrinths of its kind, with a six petal rosette in the center representing formation and transformation.
And symbolising the six aspects or elements of creation - mineral, vegetable, animal, human, angelic, unconscious or mysterious.
When I was very young I lived near Paris, and visited Chartres. I'm sure I didn't walk the labyrinth then, and I wish I could walk it now as an adult - it is the most-walked labyrinth in the world.
It's believed that in the early 13th century those who couldn't make a pilgrimage to Jersualem during the Crusades created the 11-circuit labyrinth to provide a pilgrimage inside the cathedral itself, with an odd number of pathways to follow.
Labyrinths have been an ancient symbol in many different cultures for thousands of years. It can be a metaphor for life, walking a single path into the center and following the same path out to the beginning, in silence and meditation. The romans and those living in Crete also had this design in their cultures. Romans buildings have pavement labyrinths in the floors of bathhouses, villas and tombs, although they are too small for walking.
Labyrinths and mazes date back as far as 3,200 years on pottery, cast in stones and woven into baskets. In the southwestern United States there is a design called 'the man in the maze' that you find on pottery designs, especially blackware pottery. These designs are seen often with the Hopi and the Navajo, in jewelry and baskets.
Each line in the maze symbolizes a time in life - birth, childhood, puberty, marriage and death in a continuous line as the journey of life unfolds. As the journey continues, the traveler gains knowledge, strength and understanding.
The Celts described the labyrinth as the 'Never Ending Circle' similar to the stone and bronze age cup-and-rings Pictish carvings in the Highland rocks of Scotland. I visited some of them myself on a trip near Lochgilphead.
In Edinburgh there is a labyrinth in one corner of George Square Gardens that's based on the one in Chartres Cathedral. I missed seeing and walking that one, when I visited Edinburgh years ago.
You may have a labyrinth near you now, in a church or park. They are, somewhat surprisingly, found in many places in America and Canada. Some are indoors, painted on floors, others are outdoors in gardens.
And the difference between a labyrinth and a maze is very important. Do you know the difference?
Wednesday, December 17, 2008
Journey Not Destination
I make a lot of things, different kinds of things. Just whatever takes my fancy at a particular time.
Because I work a career that takes a lot of my week, my day and my energy, I try to keep my creative times free and loose.
Enjoyable.
Not just another form of work.
So that the hobby, the relaxation I find in creating, doesn't become another source of stress instead of the antidote to it.
When I have some un-fettered time, I grab it and spend the hours 'in the zone' doing things that are creative and satisfying. Sometimes that means experimenting with new possibilities. Or using a different media, something new to me.
Or just returning to something familiar to while away a few hours working with my hands, heart and mind on something that's been whispering in my ear, murmuring at the back of my mind. Try this! What happens when these things go together?
That time 'in the zone' goes faster than any other time spent doing anything else!
There are times when I come away with a handful of new things that are completed. And many other times when I have just a few that are not quite done, but looking like they have possibilities.
I try not to push myself, the exceptions being if I owe someone a custom order or if a magazine is waiting for photography for an article.
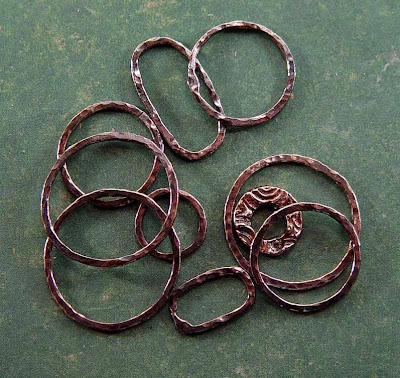
Otherwise, it's open ended and anything goes. That's why I find it so exciting and wonderful when someone else finds a use for something I've made, like these fine silver rings I made for Gaea a while back.
I think of a lot of things that I might do with them, but I'm always certain that someone else like Gaea will come up with a different, most beautiful design. And this time I'm right!
Isn't it fun and fabulous how she attached the fused, textured fine silver ring to the cord? And added the special little dangles? You can read the meaning and purpose of this necklace on her blog.
I'm simply thrilled that, in a secondhand kind of way, I had a little part in this creation.
And thankful that she shared it, so I could see! and show you ...
Subscribe to:
Posts (Atom)