Showing posts with label fusing. Show all posts

Wednesday, May 30, 2012

Bling Soldered Setting

     This is another one of the beveled and fire polished faux gemstones from Monday's session at the studio. I made a wire setting and soldered it to the glass, with lots of loops so it can be hung various ways or have dangle attached. 
     I love being able to create my own faux gemstones. This one has a white glass backing, so the dichroic glass has a pink tinge to it, not luminous the way it is with black behind it.
     It's really hard to capture it in photographs, but when you tilt the dichroic a different direction and capture a reflective light hitting another part of the stone, it changes color. Here, it turns from the pink to a light blue-green color. So neat! I love dichroic glass!
     I wanted the wire wrapped setting to have an organic look, sort of like vines wrapping the glass. It's kind of hard to get it set just right, when the glass is hot, the soldering iron is hot, and all you want to do it grab it with your fingers and hold it, but you can't!
     Thank goodness for pliers and soldering aids! And my heat-resistant fingers.

Tuesday, May 29, 2012

Kiln BLING

      A while back, I took the kiln for a test run, to make sure it was working all right after the relocation to Louisiana. Moves are tough on kilns! I made these fused glass gems, and then didn't get around to shaping, beveling and fire polishing them.
      They have a black glass backing, to make the dichroic glass really shine when fused. Yesterday, I spent the morning at the studio, just playing around with different things I'd been wanting to do. One of those was to get the glass grinder set up and working again after unpacking it. I have a beveling blade on it, so I can put those nice 45 degree angles on the glass. But I hadn't used it since setting up the studio. The first time I tried yesterday, the water feed wasn't working. To keep the glass cool, a flow of water has to be going over it while you grind. Otherwise, the glass overheats from the friction, and it can crack. Not fun!
      I took the water feed line completely apart, flushed it, and got all the different parts working again. When I reassembled it, it was finally working like it should. I shaped and beveled these little faux gems, to make them more consistently rectangular, and to give the fronts a pretty little bevel, like a real gemstone.
     Once they were all shaped and beveled, I cleaned them carefully with 90% alcohol, to get rid of all the glass dust and "shavings" from the grinding. Then I put them in the kiln for a fire polish firing, to remove the grinder scratches, and give them a clear, nice finish on the top.
     I think they turned out well, after all of that. And now I know my equipment is still working okay. Now, I just need to make settings for them, so they can be used in jewelry!

Friday, February 11, 2011

Pretty Shiny Glass

I love dichroic glass when it's fused.
If you aren't familiar with dichroic glass, it's a metal-coated surface on glass that's used for optics and some space age glass applications;
the metal is applied to the surface of the glass in a vaccuum.

Sometime in the 1970's someone who worked in hot glass wondered what the dichroic glass would do when it was heated to melting temperatures.
And learned by experimenting, that it created a two-color light reflection.

I cut the glass, layer it with white, clear or black glass, and fuse it in my kiln.
It brings out the beautiful, shiny light reflections in the glass.

This little connector is made using a cabochon of fused dichroic that I made before the kiln was packed up and moved. I keep coming across little pieces like this in the studio.
I need to cut some and try fusing again, to make sure the kiln relocated okay.

And before it gets too hot outdoors. Definitely NOT a problem right now!

Monday, January 17, 2011

Glassy-Eyed


In the months since I packed up the studio and relocated, I have not been working in glass as much as I used to.

For the simple reason that I haven't unpacked all the tools for it.

I need to cut and fuse some glass, to make some faux gems.


But I had this one left over from another session, so I finally made it into a connector piece.

I don't know if you're this way, too, but for me it's "out of sight, out of mind" and I forget about things.

I need to go root around in all the boxes in the studio.

Who knows what else I'll find that inspires me! It's like Christmas every day.
Surprise!!!

Wednesday, June 9, 2010

A Lot of Heat, No Kidding


At Artfest I took two classes that involved enameling copper. I've been wanting to add some enamel color to the pewter pieces.

Finally the weather was warm and dry, and I could set up the glass topped table outdoors and play around with enamels.

I had all the supplies, but after reading a lot of safety information about using enamels, I decided not to use them inside the house, so I had to wait for all the rain to stop. Saturday was the day.


I cut some small strips of extra copper, so I could do tests with the four colors of enamels I bought a while back. I didn't know what the colors would look like. They're called Spring Green and Mocha Brown, Opaque White and Yellow Flax.

I want to get some Oriental Red, but I need to get a few more funds in the PayPal account before I do an order of enamels.

So these test strips are the colors I tried out first, so I'd know what they would look like. Before I cut some round copper and domed them, to try to make charms.


One thing I learned is that the torch is very, very hot and can burn up the copper. No kidding, that torch is super hot. I burned up this first set of domed rounds.

But hey, that's how you learn, right? You push to see where the limits are. How many times could I re-fire the copper, if I wanted to add layers to the color?

How far away from the soldering stand did I need to keep the torch?

How close did it need to be, and how many seconds, to get the enamel totally melted?

That's what I was experimenting to find out. Hope you don't mind seeing the failures, the ones that showed me how far NOT to go when using the torch.


Finally, after I kept trying, I got these two little sugar cherry domes, they remind me of candies. I balled up the ends of copper wires to make ruby colored balls and wire-wrapped them to make loops.

I know if I keep working with it I'll get better.

I went ahead and listed these drops in the Etsy shop, to test and see if any of you are interested in the enameled copper drops?

I think they'd be really sweet as earrings.

So - should I keep forging ahead with enameling?

Monday, May 10, 2010

Magpie Eyes


I took some time on Saturday morning, before I got onto something else, or got distracted, and cut some glass for the kiln.

I put some colorful dichroic glass on some clear backgrounds, and some onto black, and fused them to make faux gemstones.


I plan to combine some with wire settings, to create special settings. And to combine some with pewter, to enhance the bling level and add some color. They have an inner glow, and change color and sparkle as light hits them.


I'm wondering if any of you would like some rough cabochons to use, just the fused glass.

Another thing I do sometimes is grind a channel around the outside of the glass cabochon and use wire wrapping to make a little dangle. What do you think?

I like to use them to give a special organic and fancy look to the components. Shiny shiny, pretty pretty.

I think I'm part magpie, collecting shiny bits.

Wednesday, May 5, 2010

Glassy Eyed Darkly


I really need to cut and fuse some glass, I don't know why I don't seem to get around to it.

It is constantly on my list of to-do items, and yet I don't make time for it.

I had a fused dichroic cabochon that I combined with the pewter to create this dainty glass drop.


It looks like a gazing ball, it's translucent but with beautiful colors embedded inside from the dichroic.

Sparkly, through a glass darkly.

Monday, April 19, 2010

For a Friend, Shiny Thoughts


Do you get the impression that I get started in a direction and end up in a groove and have a hard time changing directions?

I guess I get going working in a media, get into it, and stay on it for a while.

I've had a friend, a very patient friend, who has been asking for some fused glass.

So this weekend I took a time out from the orders, from pewter and polymer, and made this pair of fused glass dangles.


I am so happy they turned out, and they're headed to their new home.

I do owe a couple of people some special items, and they're on my list.

But this one is done, and I'm pleased. Feels very good!

On to the next one, bring it on ... I'll work it in, too. It's good for me to learn balance.

Thursday, April 1, 2010

Old Time New Way


I took classes with Melissa Manley and Richard Salley on enameling with a torch. It seemed very new-wave and up to date, a brand new method of working with enamel and copper.

This is a photo of one of Richard Salley's class projects for a class he's teaching later this year. That central part is enameled copper. Lovely, isn't it? I wish I could take some more classes with him, he's a great teacher. I'll talk more about the class later on in other posts.


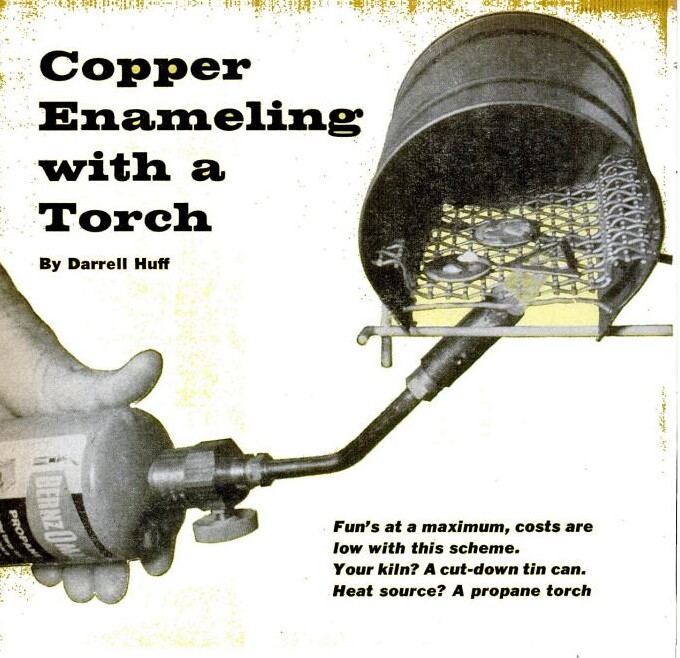
I got curious about the background of torch firing enamel and started doing some research; I found an amazing old article from "Popular Science" magazine, it was published in November.

Of 1960, that is.

A while back. And yet the instructions are very similar to the methods used and taught in the classes I took last week.

I find that facinating.

What's that old saying about "nothing new under the sun" - yet again we find how true that can be.


Of course, there is some new technology also. There's no need to cut down a tin can if you don't want to go that way, you can get a soldering trivet.

But I guess if you don't want the expense of a soldering trivet, there's probably a metal coffee can around somewhere, right? I might give it a try just to see what happens.

And the BenzOmatic propane torch shown in that quaint old photo - it's basically unchanged, and the torch head is the same also.


Just goes to show, how old things become new again.

I've been doing some historical research on enameling on copper. It is a very ancient technique, and it's been around long before tin cans or propane torches.

And it's still evolving now. Facinating...

Monday, March 15, 2010

New Work Looks Old


I had a productive weekend, I got some things shipped and some new things made.


When I get the chance to pour some resin, when the weather cooperates, it's almost like I get charged up with new ideas.


I created another of the pendant focals with the word "FAIRYTALE" inside, and with a small feminine bow tied on the bottom, like a little girl's fairy story dream.

And some fused glass in a pewter setting that reminds me of a lady's antique watch casing.


The glass changes color from a dark green to a dark violet, depending on how you hold it. I do love how the fused glass faux gemstones shine things up.


I made some more pewter pieces and added it all to the Etsy shop. It reminds me of a treasure trove you might find in an estate sale, or in a flea market, a little pile of goodies.


I made a faux cameo on a pewter setting. I need to fuse some more glass, and cast some pewter. And I'm working on a special project that may be for an article, got to set aside some time to work on that. Maybe I'll give a sneak peek before I send it off, the deadline is April 15.

My back is doing better, thanks for all the good suggestions.

Monday, February 22, 2010

Chaining Linking


I've been thinking a lot about fused silver links.

I love the way they look, the lightness of them and the hand-crafted quality to them, not like manufactured chain. I've been making notes in my little portable journal as ideas come to me.

I'm playing with fine silver wire to make the links. That's almost pure silver, not like sterling silver that's an alloy, these are 99.9% pure silver. Just for fun, I decided to twist the fine wire before forging the links shut.


I didn't know if they would fuse properly, but I wanted to give it a try.

I made these two short lengths, with two twisted wire links and one hammered and textured link.

I think they're really pretty. I decided not to put liver of sulphur on these two three-link sets, because they are so pretty just the way they are. Maybe later I'll patina some too, to make the twists show up even more.


I put them in the Etsy shop, they are really nice with the pewter, I could see them used for a pair of unusual earrings. Or on a bracelet with a focal bead in the center.

Or maybe with a pair of hearts hanging from them, as long ornamental dangly earrings.

I need to make some more pretty quickly and play with them...

Friday, January 8, 2010

Snowdrops and Sparkles


I'm back from traveling, the holiday decorations and the tree have been taken down and the snow has been falling. Lots of snow.

I know it's cold across the country, even in some places that don't normally get low temperatures in the US, so I hope you're all safe and cozy and warm.


These pretty little sparklers remind me of faux opals, with their clear shiny lights inside. They're fused glass, I made them with a project in mind, something I saw in last summer's Belle Armoire Jewelry Magazine in a feature about Amy Hanna.

I'm going to put them in the Etsy shop with the pewter, in case someone wants to design with them. I can make some more in the next few days, if I want to create with them. They're fused dichroic glass, little drops of sparkling light.

Right now they remind me of the trees outside, with crystal light ice drops hanging on the branches.

I have lots of catching up to do. But it's very, very cold in the studio right now. The cold snap won't be gone anytime soon, so it's time to get out the space heater.

I'll get some glass cut and into the kiln for fusing and turn on all the tools that generate heat, that will help.

I have some posts planned for next week of some new tools, and some tips that I want to share. Trying to post more regularly, now that the new year is here. Keeping in touch with all of you.

I'm sort of glad the holidays are behind, the travels are over. It's exciting and fun, but kind of tiring too. Nice to be back in a regular day to day swing of things. Do you feel that too?

I put quite a few pewter pieces back into the shop too, it had gotten low. I need to make quite a few orders, thank you to all of you who seem to enjoy the pewter pieces.


I've also made some strands of what I'm thinking of as "companion beads" - I've been wearing them in differing lengths with some of the finished pewter jewelry. They don't have a clasp, they just slip on over the head.

The bicone light colored strand was hand dyed by me, to match some of the costume pearls.

The black are large glass seed beads.

I'm thinking of offering them to go along with the pewter pieces, but I don't know if anyone else would like using them. What do you think?
~~~~~~~~~~~~~~~~~
Well, someone liked the little sparklies, they are gone already! I guess that's definitely a clue I should make some more this weekend.

I love the pretty dichroic fused glass pieces, they are like faux gemstones. Guess the kiln will get a workout soon.

Tuesday, December 8, 2009

Glassy Blue Pretties


I was messing around in the studio last night, finishing some requested items, and while I was waiting for some metal to cool -- no more touching with hands, no no NO --- my eyes turned toward some fused dichroic glass cabochons I'd made earlier in the year.

I guess with all the sparklies and shiny things at this holiday season, I thought about brilliant beautiful glass.

I had originally intended the pewter setting to become a faux antique wristwatch - and I still plan to make one, with a stretchy band full of dark beads or hand dyed pearls - but it was a great coincidence that the glass just fit into the setting.

It was meant to be!


This is part of the reason why I don't clean up the studio, sometimes setting something down next to something else sparks an idea. At least, that's the reason I give myself.

At 10:00 pm my hubby came down to the basement and asked if I knew what time it was.

At the time I had on a headscarf, safety glasses and a respirator. Oooh, scary looking! I nodded that I knew what time it was and kept working away.


And this is the result. I added some semi-precious stone chips, and then a cast pewter cross that seemed in the same style.


I love the dichroic glass, how it shines and changes color as the light moves on it. It's hard to capture in photographs, it looks like it has a blue flame inside. I must cut and fuse some more glass cabochons this weekend and get them into the kiln, I must!

Anyway, I felt I must "test wear" this piece today. Just to be sure it's really as pretty as I thought.

I had to do it!

Saturday, September 19, 2009

Moving Slow


I usually get up and get going on things early on Saturday mornings. But today I slept late. That's very unusual for me. I'm a morning person.

Almost everyone at the office has been sick, or is getting over being sick. So last week was truly busy and challenging, with many folks at home ill.

So I've got a lot to do today. I've got packages to finish, wrap and ship. I've got to send the finished faux amber pieces out after I attach my name label to all the pieces.


This morning I made some chain links. Part were for an order, and some were to add to the shop.

I got really pretty patina on this group. A little blueish, and very warmly golden.

No matter how I try to find a pattern in the colors I get on the fine silver from the liver of sulphur, it's always different.


I think it must be related to the weather somehow. The patina will lighten, if you use a Sunshine cloth on them. But I like the heavy patina, so I leave them.

So I've got to get back in the studio and finish my packaging and make a run to the Post Office.

And maybe stop for some lunch at a deli on the way back. How decadent!

Monday, August 17, 2009

Fine Silver Links

On the blog left sidebar there's a link to a five-part tutorial on using fine silver wire to create chain, fusing the wire with a torch. If you've never tried it, it can be a bit challenging but very magical, too.

I've been doing a bit of chain making, and got these lovely colors out of the liver of sulphur.


They look a little like gold, a little like copper. With some blue tones in the joined link corners.


The links have definite lateral lines in them for texture. These were made with eighteen gauge fine silver wire, one length is three links and one is five links.

I like to make chain. The links look so much more organic than the store bought chain.

Saturday, August 15, 2009

Looking To Face Past, Looking at Past Faces


Today has been a truly mixed media day, but very productive. I worked in several media, changing from one to another as the needs of each changed.


I wanted to pour some more resin words like the ones I've been making into charms. First the molds had to be prepared, and the first layer of resin poured. That had to sit for a while, so I changed to glass.

I ground the edges of some fused glass cabochons and put them in the kiln to fire polish the edges.


While the kiln ramped up, I made some glass word charms and got them all ready to solder together. When the glass cooled, I got the faux gemstones ready to use in making charms and dangles.

Back and forth, all day. Between casting pewter and casting resin. Between grinding and firing glass.

There's a method to the madness though. I've got the entire week of Labor Day off from the day job. So I'm trying to get as many components and things prepared ahead of time as I can, so I can spend the week working on designs.

For me, that's a good way to spend time off --- in the studio.


I wanted these charms to look like something from an advertisement, maybe from one of the British colonies way back before the turn of the century. The back sides have an advertisement on them, the fronts have lovely faces, interesting words and rhinestones. I've had them on my mind for weeks, and finally found the time to create some!


Very jazzy, and what I have to show so far for what I did today. Now I have to keep my hands off the resin and let it cure overnight. No touching, no peeking!